Salesforce
Create or Edit Email Template
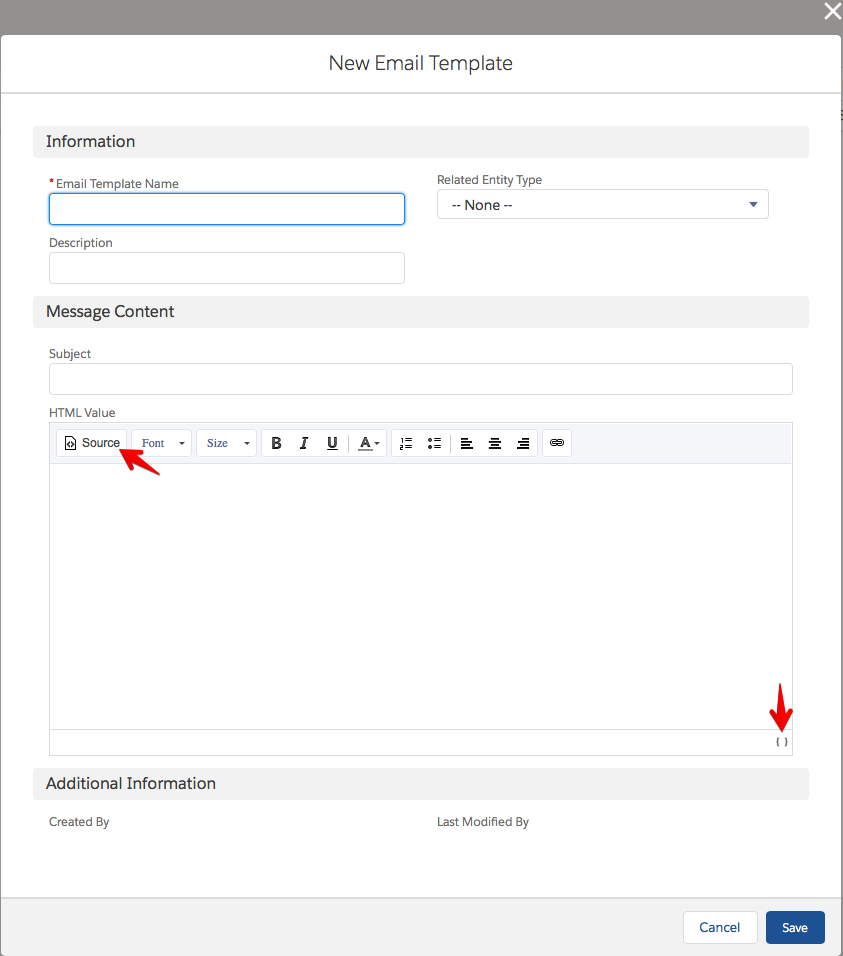
First, go to your Salesforce account, open App launcher and search for a Email template.

Click on New or edit existing template where you want to embed our code.
Click on Source, so you can paste HTML code that we provide.
{} on the bottom right allows you to include dynamic information.
We will use that to set identity and additional properties of the recipient.

Add identity data to links
Next step is to add identity and properties to links, so each answer will be associated with a recipient. Also if you enabled Identity protection it is mandatory to add it, otherwise answers w/o identity data passed on to the zenloop will not be saved.
Assuming the base_url is like this https://responses.zenloop.com/web/response/<survey_hash_id>/email_embed/<score>
First lets add identity data:
<base_url>?identity={{{Recipient.Email}}}&identity_type=email&first_name={{{Recipient.FirstName}}}&last_name={{{Recipient.LastName}}}By adding merge fields using {{{ }}} we can set identity and other data for our recipient.
We can do the same thing for properties:
<base_url>?<identity_params>&properties[city]={{{Recipient.City}}}&properties[contact_id]={{{Recipient.Id}}}
Merge fieldsRemember to use
{}in the bottom right to include dynamic data in your email.
Use the same data for all the score links - set it for one url and then copy/paste for other urls.
Exit source mode before savingMake sure that you click
Sourceagain after you make your changes. Otherwise, it will not save tracking pixel. Another problem is that it will record the survey view.
To avoid recording multiple surveys views, add the tracking pixel after you are done with all changes. You can also add it just before sending it to the users.
Updated 8 months ago
Check how you can customize our template or see Salesforce documentation for more information about templates/sending emails.
